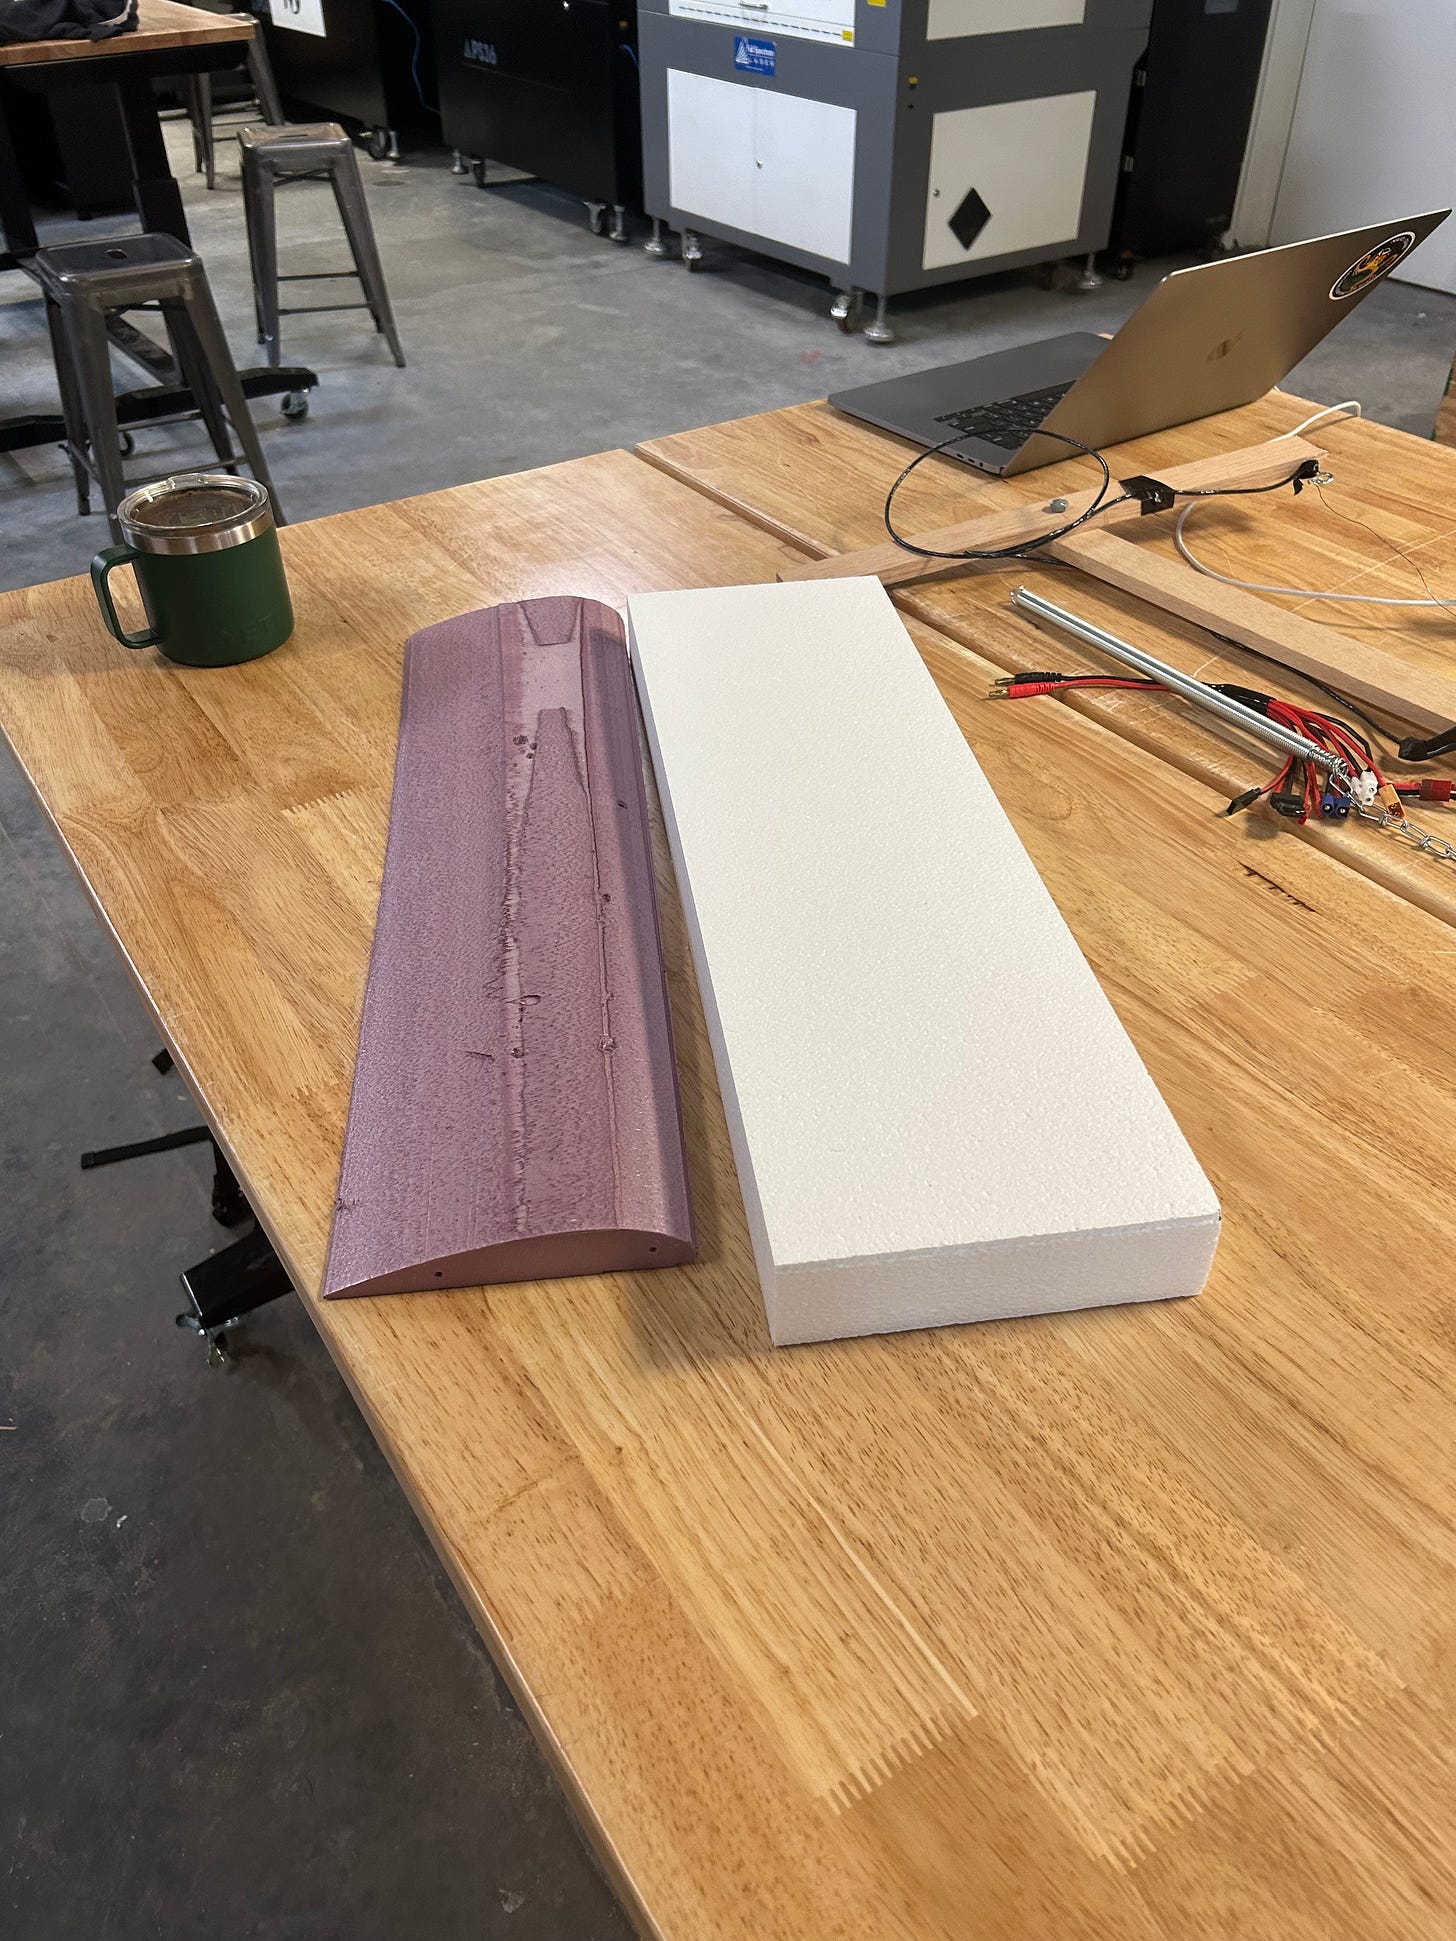
Petaurus’ mission is fairly unique, in that the wings must be extended from a folded position during free fall. This unfortunately meant I couldn’t find any wings off the shelf that quite fit the requirements, so I’m making them myself. I’ll be making foam core composite wings with kevlar hinges for the ailerons, but the first step is to cut the wing cores.
Which of these would fly better? Of course the one that’s wing shaped! You could fly with flat wings (and you have, when you made paper airplanes), but cambered wings work better. Cutting a smooth wing from foam with a knife would be exceedingly difficult. Cutting one with a CNC machine produces a precise result but takes a long time per wing. I’m using a technique called hot wire cutting as a good compromise between precision and speed. An electrically heated wire is run through foam stock using wooden or metal blanks on the ends of the foam as guides to produce smooth cuts. I’m using a relatively rudimentary setup that I operate by hand because I don’t have a dedicated workspace, but if you have your own workspace then check out Lost Wing’s very elegantly semi-automated method.
There are several ways of constructing wings. A simple foam wing seems unlikely to survive the transition from falling to flying, but doing some really awesome hollow carbon fiber stuff like DarkAero seems a bit overboard (at least for now). I’m starting out with a foam core composite wing with a carbon fiber tube spar because it seems like a good tradeoff between construction complexity, cost, and stiffness. The first step in building this is to cut the foam core of the wing.
Choosing an Airfoil
The first step to making something is deciding what to make. Different airfoils are good at different things. This is why planes with different missions look so different. AeroToolbox has a great breakdown on factors that go into choosing an airfoil for a given mission.
We want Petaurus gliders to land packages that are large relative to the size of the glider, and land slowly to be gentler to the payload. We don’t care so much about top speed, or aerobatics, so we’re going with the beefy NACA 6317 airfoil.1
Making and Mounting Wing Blanks
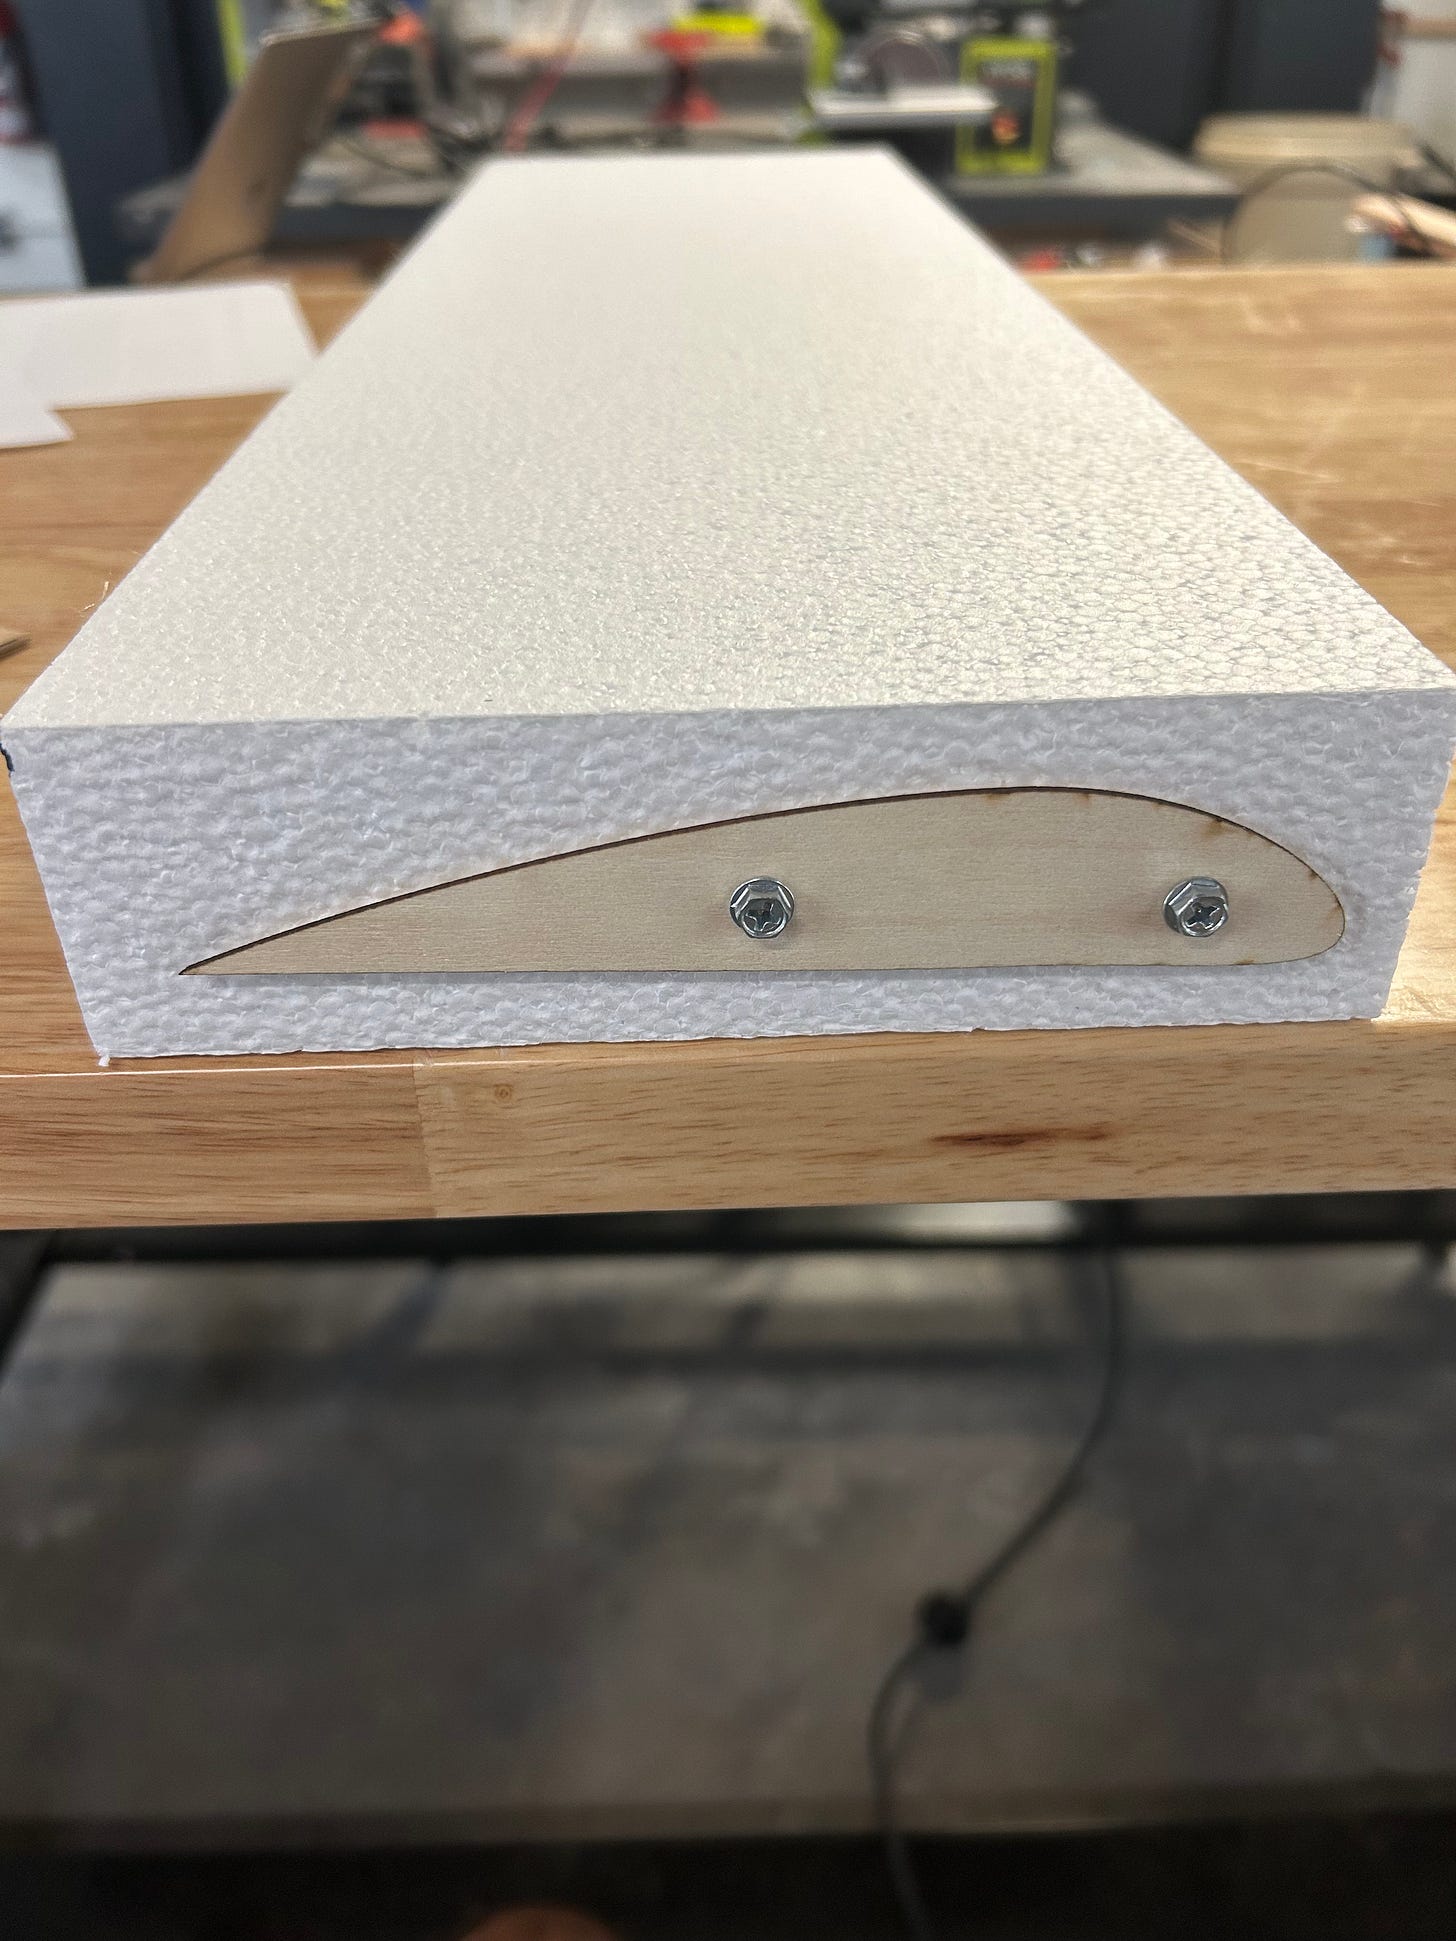
Now we need to convert the profiles we’ve chosen into something that we can use to guide the hot wire through the foam. I’m using 1/16” plywood2 in this case.
Next we have to drill some holes so we can mount them to the side of the foam stock. They should be far enough apart from each other to not let the profile pivot easily once mounted.
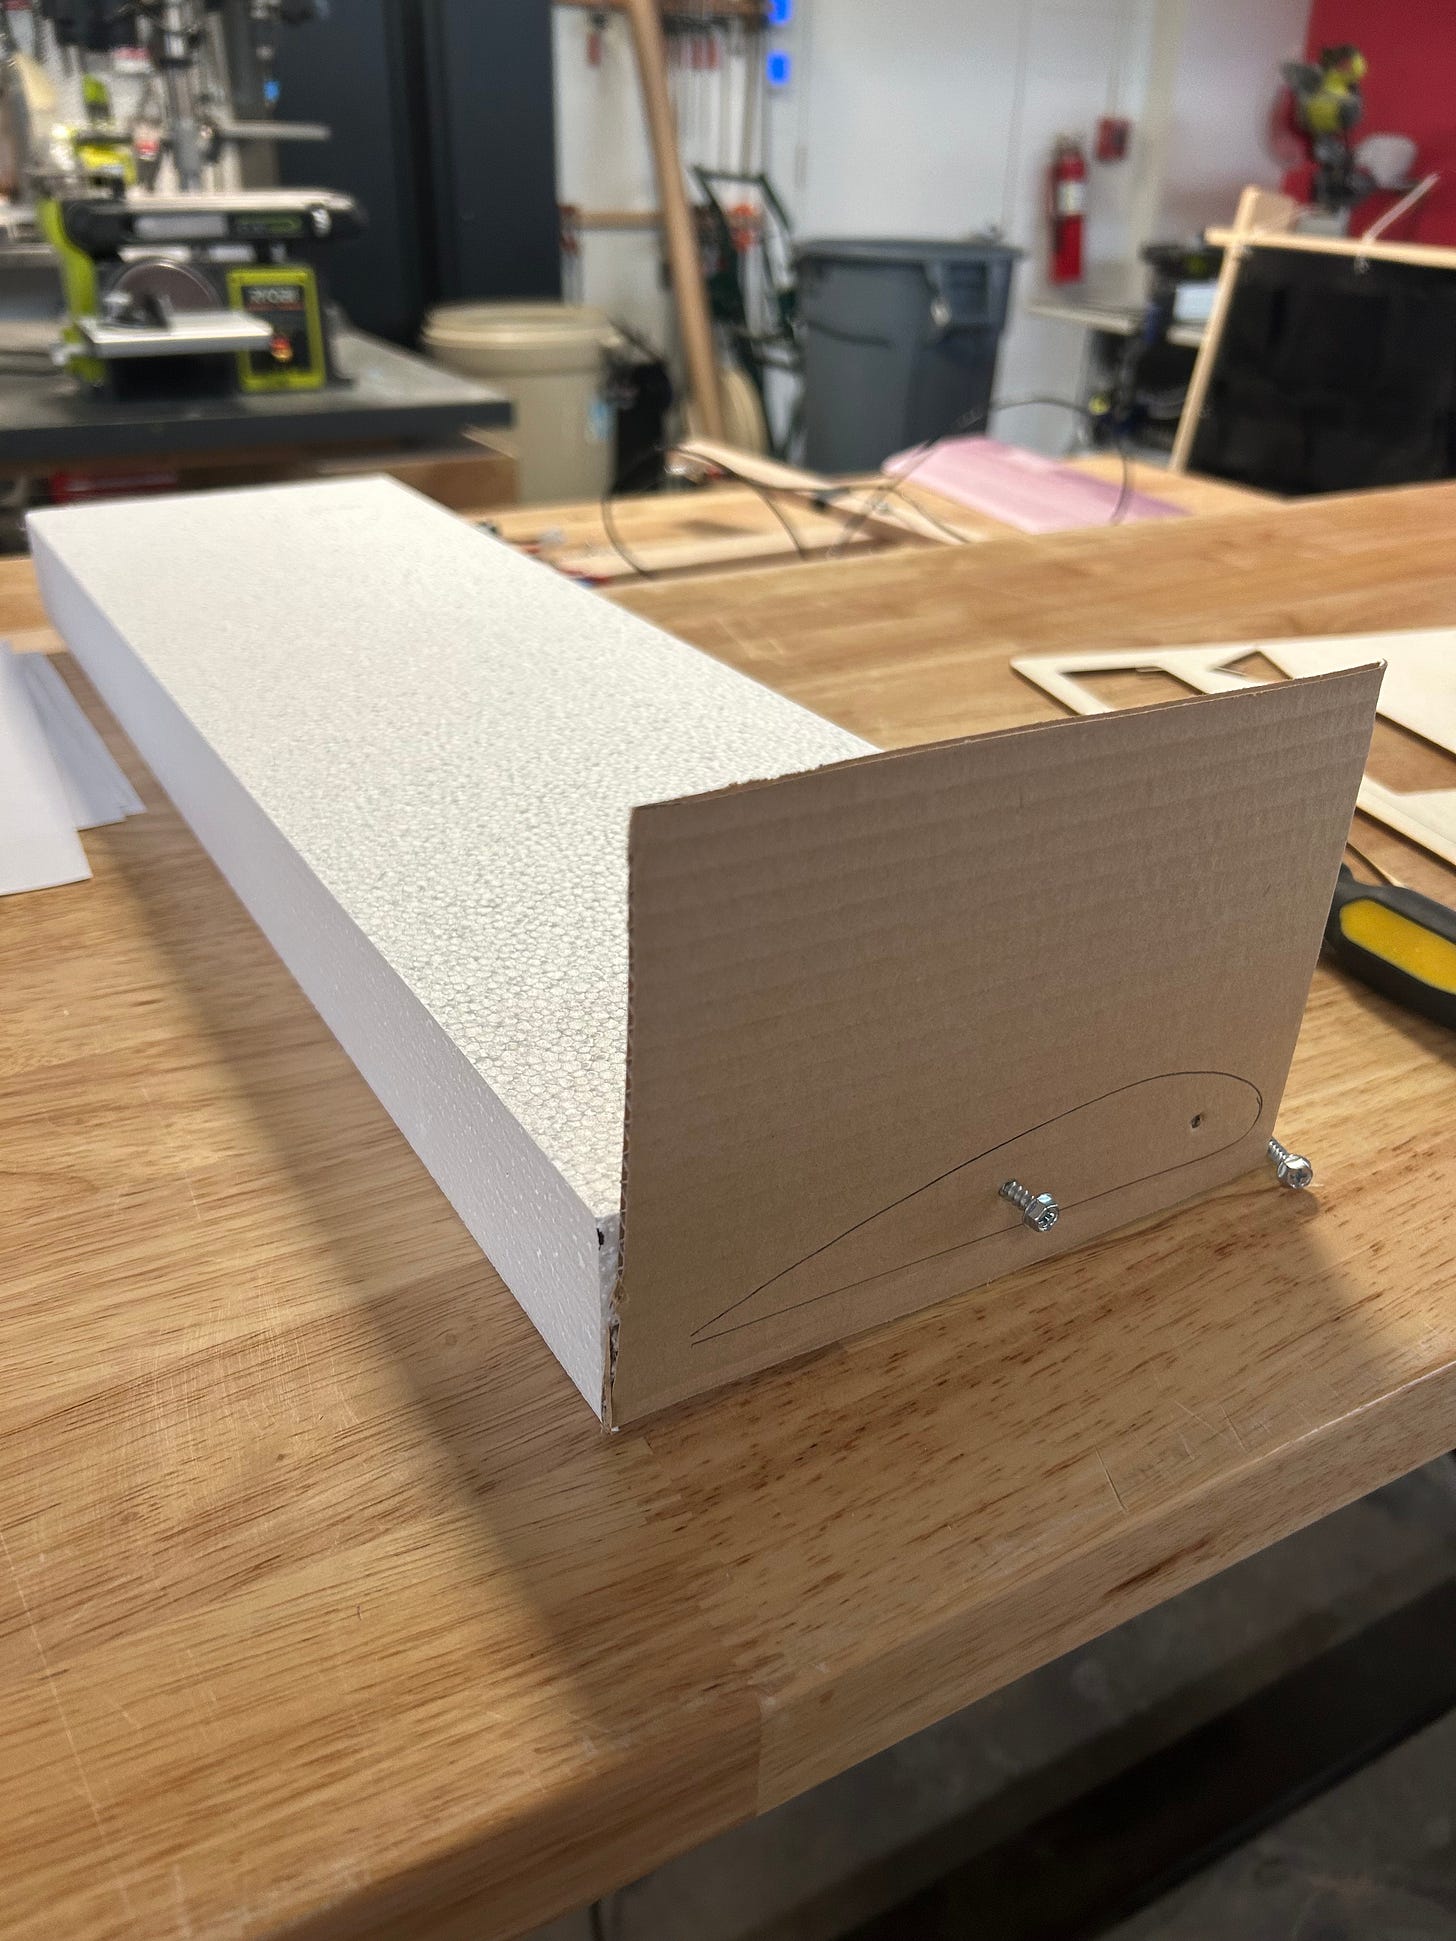
I made some guide holes using a piece of cardboard to ensure that the holes would in the same place on each side. This ensures that the blanks are mounted in the same position and orientation on each end of the foam stock and that there is no unintended twist along the length of the wing.
Here we have the blank installed. Over at the other end of the foam stock there is a corresponding blank. It’s important to make sure you insert the screws or pins perpendicularly so they don’t intersect with the path of the hot wire and cause it to snag.
The Hot Wire Bow
A hot wire bow fundamentally consists of a taut high resistance wire (like nichrome), a frame to move that wire through a piece of foam stock, and a source of electricity to heat the wire.
Here I use three pieces of wood and a couple M5 machine bolts as the frame, and then use a spring and some chain to apply tension to the nichrome wire. I have also seen others use metal or PVC for the arms of the frame.
The power is supplied using a digital battery charger3 with which I can select the amperage and volts (6 amps and 14 volts were used here, but YMMV and you should experiment with wire length, gauge, and material being cut).
Make sure you wear eye protection when the wire is tensioned: if any of the eye hooks fail then a hot wire or heavy spring will suddenly move very fast.
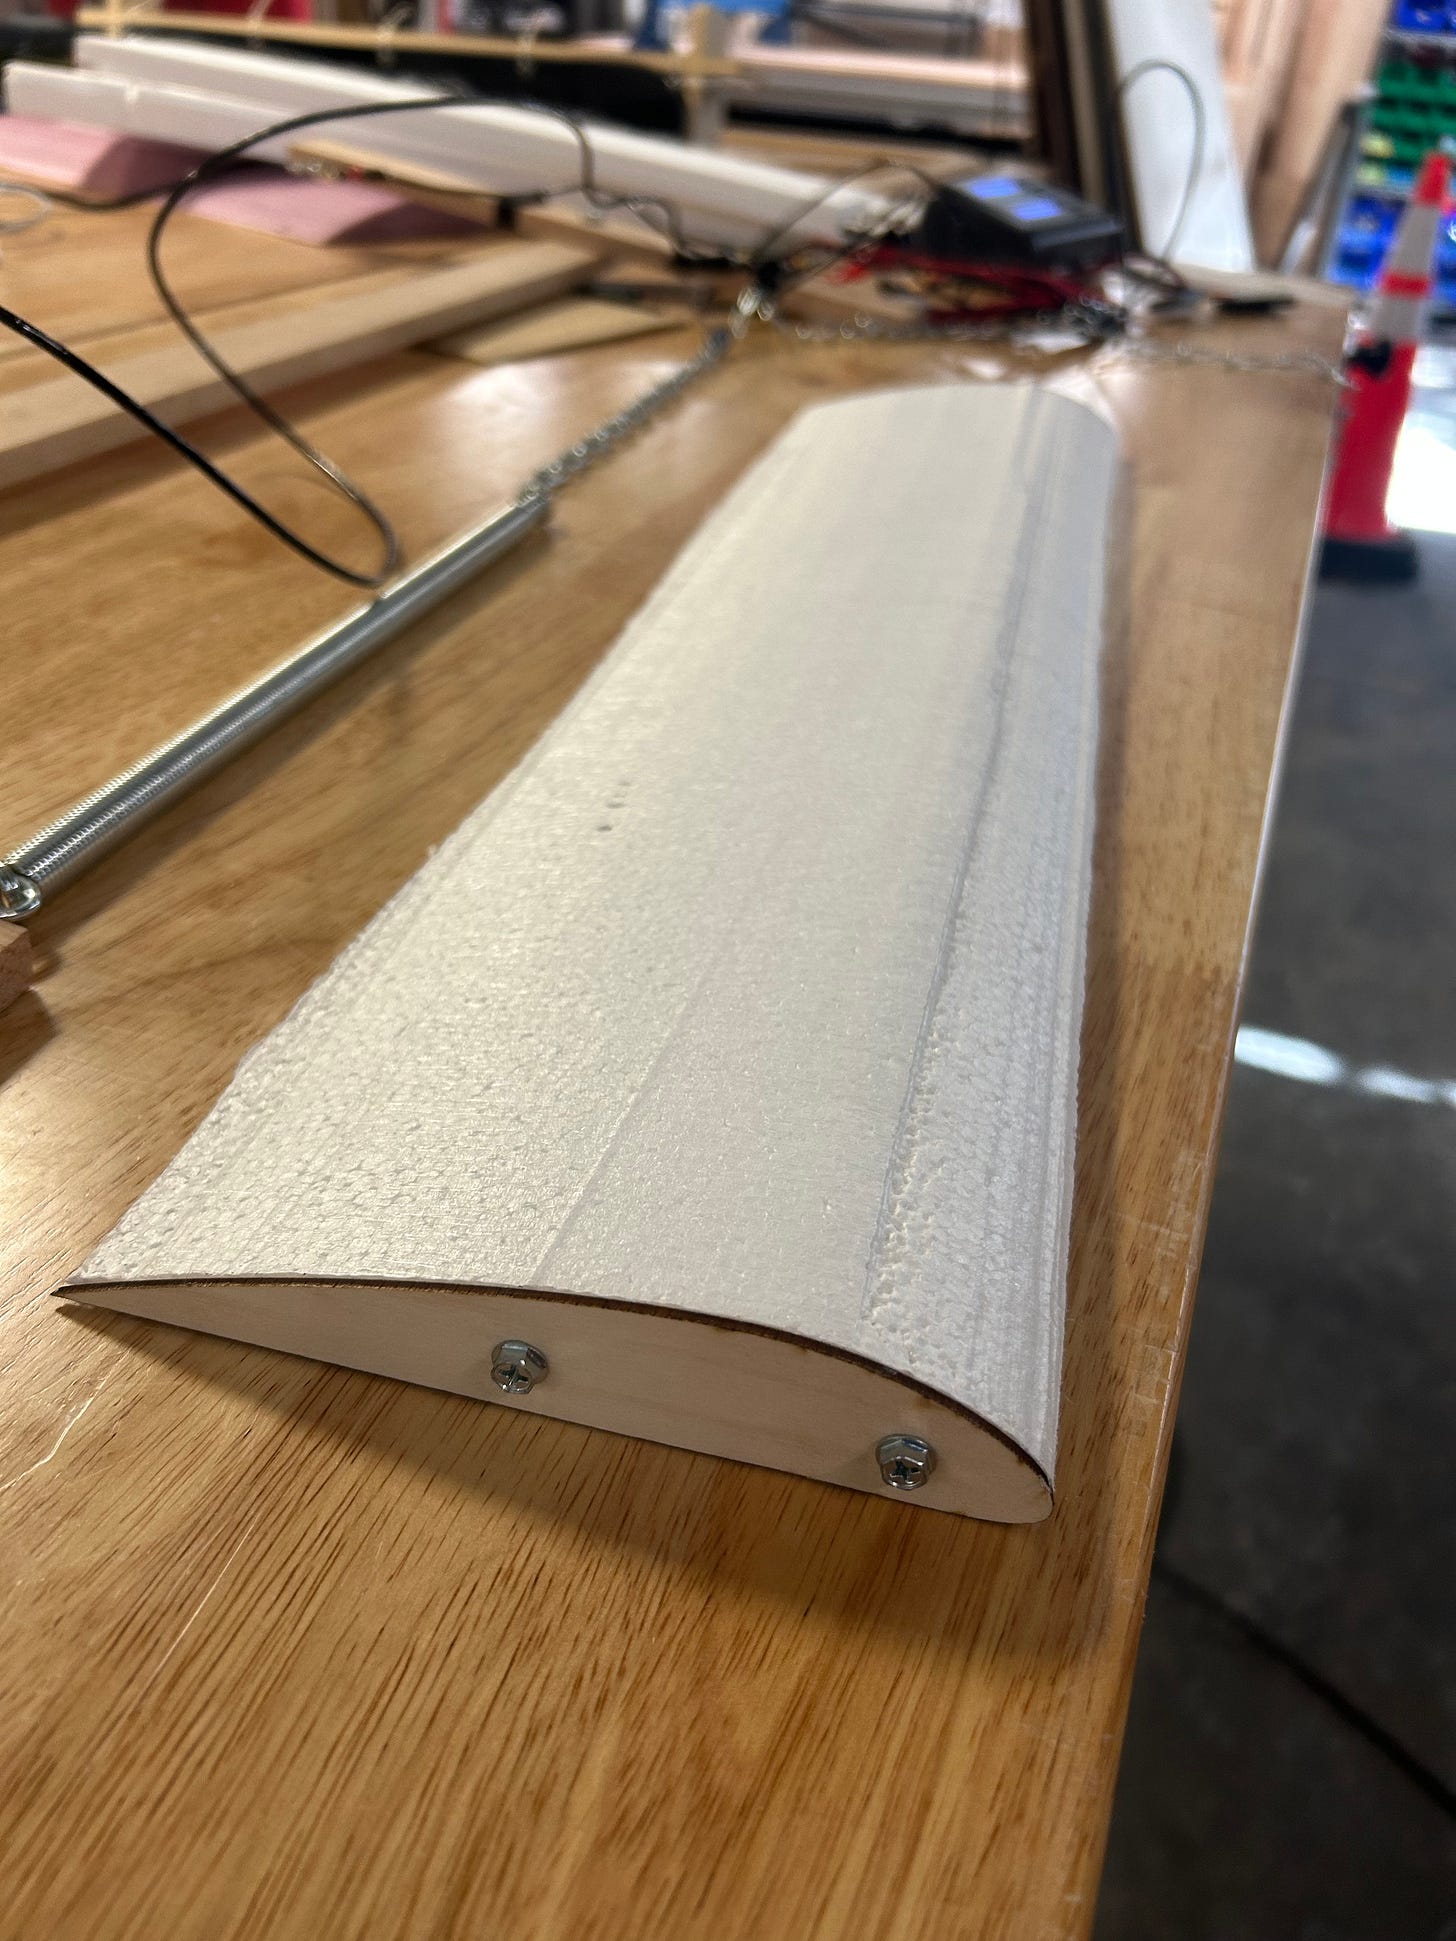
Throw some clamps on to make sure the foam didn’t move while being cut, and the set up is ready to cut! … but I was the only person in the maker-space that day and I don’t have a tripod for my phone, so we’ll just jump to the finished product!
Not too shabby! It could use some smoothing down towards the far end but by and large this is a nice smooth cut.
Making Room for a Spar
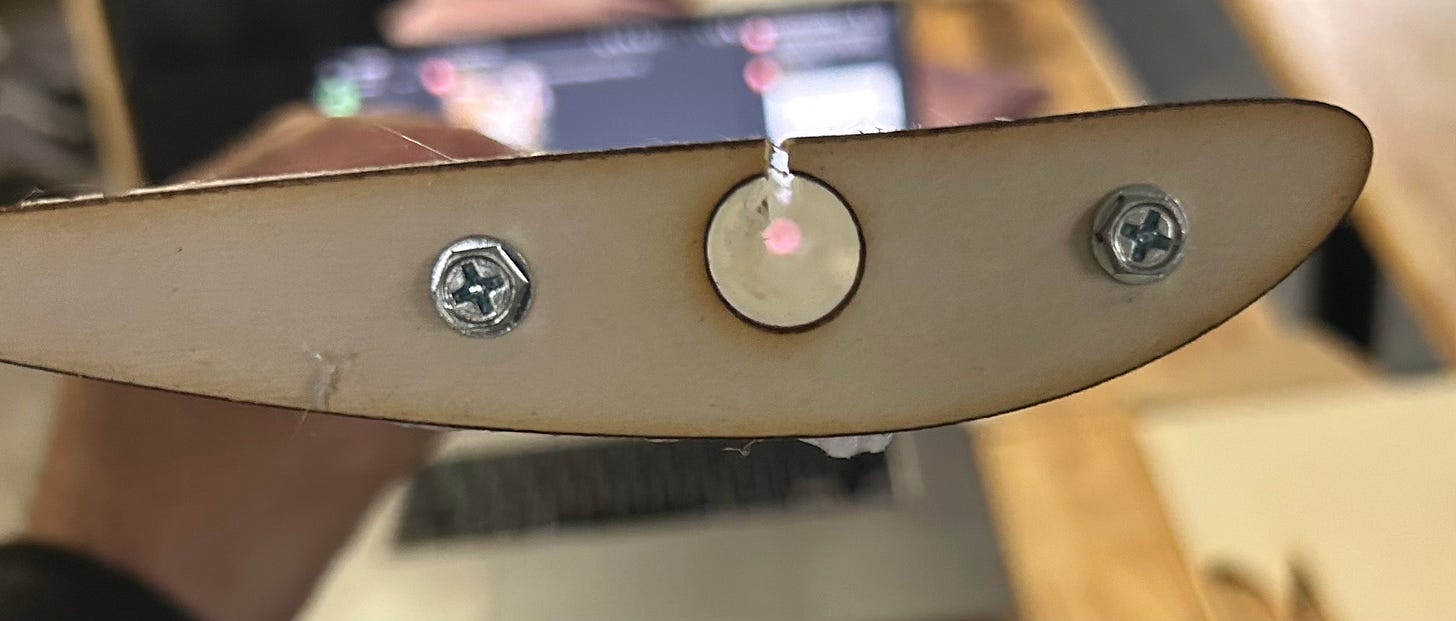
We want to put a carbon fiber spar in the wing which means we want a hole down the length of the wing. The wing is two feet long, so using a drill is a bit problematic, even if I made an attachment long enough it would probably be a bit wobbly and imprecise. I ended up trying something a bit experimental (forgive me if there’s prior art, I could not find it). The idea was to make a new wing blank that could be used to hollow out a cylinder in the wing without having to cut it fully in half.
Here we can see the same wing blank laser cutter plan as above, but with a circle and an access path cut into it, and below, the resulting plywood cutouts. I had to use a bandsaw to widen the access slot but otherwise it came out pretty good.
I used the old blanks and a drill press to match the screw holes, and mounted them on the foam wing. Then I slid the wire cutter through the slot, did a couple laps of the perimeter and cut out the cylinder. It took a bit of experimenting with some various tools to figured out how to remove the debris from the channel, but it eventually came out and I have some ideas on how to speed up the process in the future.
Calipers confirmed that we have a tiny bit more than a half inch radius at each end so I thought the spares would be snug. The carbon fiber tubes have arrived and it turns out that they were very snug. I was afraid I would crack the foam inserting them, but it basically worked! Next time around I’ll be adding another half millimeter to the radius for clearance.
Next up is some composite work, which will be my first time trying a vacuum bagging layup, so wish me luck!
This is probably not the absolute best choice, but it is a good enough start. This is at least the right genre of airfoil.
In previous attempts I had used sheet aluminum for the blanks. I had to hand-cut it with a Dremel and some tin snips since I don’t have a CNC mill that can cut metal. This led to some not great edges and is why the pink wing up at the top looks a bit janky.


